
Robot simulator#
We will use Universal Robots ursim_e-series simulator. To run the simulator image, we need to install Docker.
Docker installation & first start#
Start
Microsoft Store.Search for
Docker Desktopand start installation.A new window will pop up after download is complete.
Leave default settings during installation.
After the installation click
Close and Restart.
Mac: Symptom: You cannot install or after installation, you cannot start Docker Desktop. Solution: You may have an older Mac which is not supported by the latest version. Try installing an older version of Docker Desktop. You find older installations on Releases.
After the installation:
If a terms screen pops up, then accept it.
Docker Desktop GUI with welcome screen should pop up. You don’t need to provide any data. Just click
Skip.
Downloading simulation image#
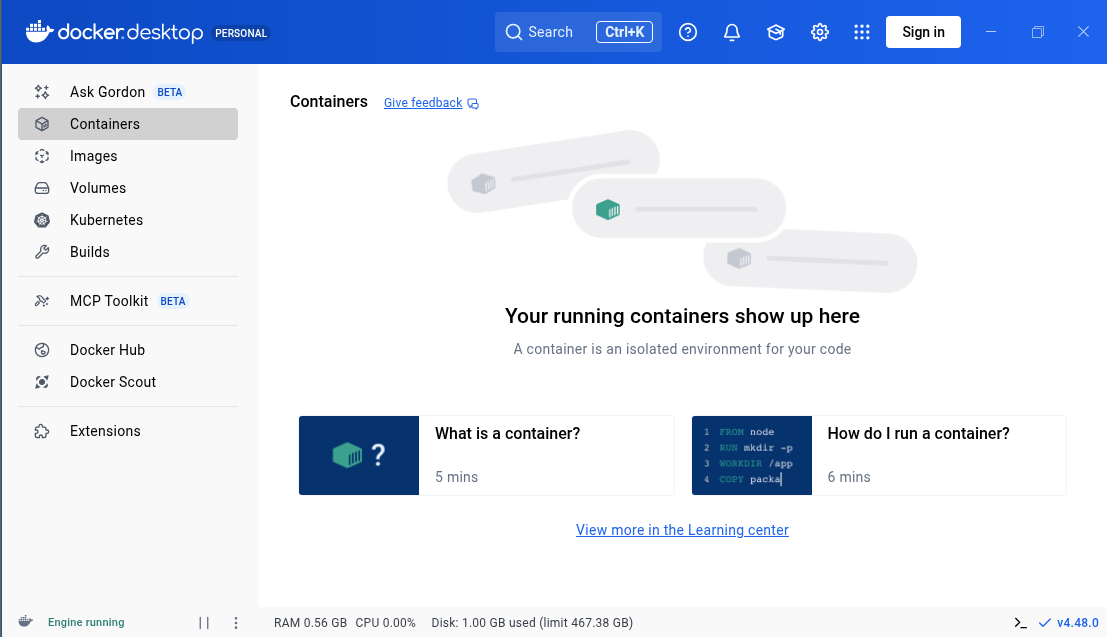
Fig. 5 Docker Desktop containers screen.#
After the welcome screen, you will arrive at the main page of Docker Desktop similar to Fig. 5.
In the search bar, search for
universalrobots.In the search results, you will see
universalrobots/ursim_e-series.Click
Pullon theuniversalrobots/ursim_e-series.After downloading, you can close the search window.
Creating a new container from the simulation image#
We have to create a container using the image to run the robot simulator.
Click
Imageson the left bar.Click ▶️ on the
universalrobots/ursim_e-seriesyou downloaded.You will be shown a window titled
Run a new container.Do not click
Run. Click icon to configure the container.
You will see
Optional Settings.Set
Container nametorobot-simulator.Fill the
Portsas follows:search for
:29999/tcp(you see on the right of the fields) and fill with29999.:30002/tcpwith30002.:6080/tcp(on the bottom) with6080.
Fill
Environment variablesas follows:Variable:ROBOT_MODELValue:UR3
Click
Run.The
Run a new containerwindow will be closed.Runcreates a new container using the image we have downloaded and runs it.Exit the search window.
You should be back on the
Containersview. You will see information about the containerrobot-simulation. The ️▶️ icon will be grayed out, which shows that the container is running in the background. You should also see some logs similar to:Universal Robots simulator for e-Series:... IP address of the simulator 172.17.0.2 Access the robots user interface through this URL: http://172.17.0.2:6080/vnc.html?host=172.17.0.2&port=6080 ...TroubleshootingMac: If you get errors about
Xvfbbefore the messages above: We had this error with a Mac Sonoma 14, but could not find a solution. We tried installing an older version of Docker Desktop and an older version of the image.Unfortunately we cannot access the IP address given above using Docker Desktop and we will use another way in the next step.
Go to http://localhost:6080/vnc.html?autoconnect=true
You should see a remote interface similar to Fig. 6.
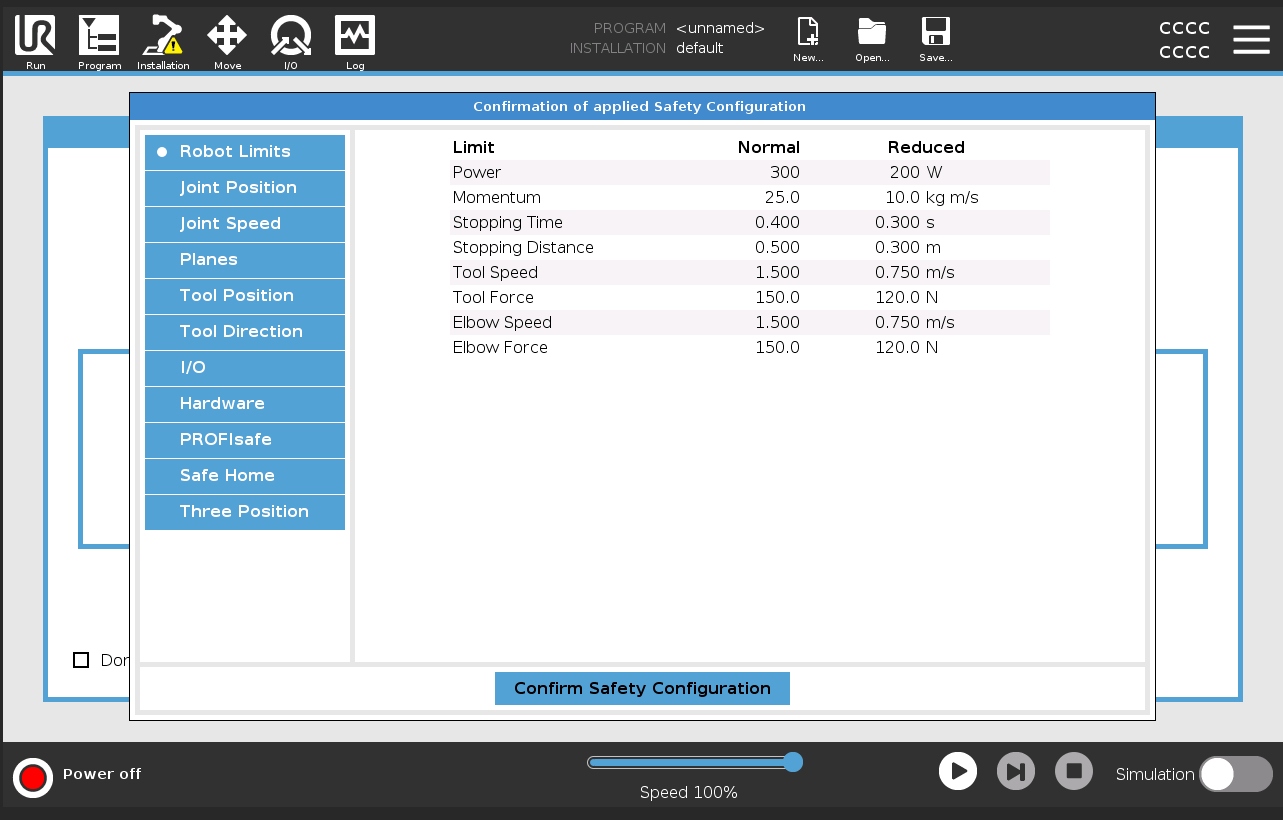
Fig. 6 Remote interface through URSim.#
Confirm Safety Configuration.You will be confronted with
Getting Startedwindow.On the simulator window, locate the round icon on the bottom left corner. If it is not 🟢, then the robot is not operational.
Click the red icon, then click
Onand thenStart.The icon in the corner should be 🟢 now.
Note
We will typically activate the robot from the C# code, so you don’t require this step every time. This step is only needed to make the robot visible in the next steps before we send a program to the robot.
Click on the
Moveicon above.You should see robot’s current pose.
Tip
To change the perspective to the robot, click
Featuredrop-down menu and selectView. Then drag the robot. The robot will be rotated around its base, or in other words z-axis.The other
Features change the perspective to the robot’s base and tool, but these views can only be zoomed in or out.
We will use our own C# code to load a robot program instead of loading the program using PolyScope.
Adding a plane to visualize a workbench#
Later, we will have exercises with the robot, where we will simulate pick-and-place movements. We will assume that there is a workbench right at the base of the robot. To add it to the visualization:
Click
InstallationClick
FeaturesClick
PlaneA green plane named
Plane_1will be placed at the origin of the robot (calledFeatureBase)and will be visible right under the base of the robot.
Sending a program to the robot#
To test the simulator, we will use a short program written in URScript – the programming language for robots manufactured by Universal Robots and send it to the robot.
The program below automatically powers on the robot and releases the brakes.
Create a new console project with the name, e.g., URScriptTest or use your scratchpad project and run the following code:
using System.Net.Sockets;
using System.Text;

const string program = @"
def f():
  p1 = p[.3, -.3, .1, 0, -3.1415, 0]
  p2 = p[.2, -.3, .1, 0, -3.1415, 0]
  times = 0
  while (times < 3):
    movej(get_inverse_kin(p1))
    movej(get_inverse_kin(p2))
    times = times + 1
  end
end
";

const int urscriptPort = 30002, dashboardPort = 29999;
const string IpAddress = "localhost";

void SendString(string host, int port, string message)
{
    using var client = new TcpClient(host, port);
    using var stream = client.GetStream();
    stream.Write(Encoding.ASCII.GetBytes(message));
}

SendString(IpAddress, dashboardPort, "brake release\n");
SendString(IpAddress, urscriptPort, program);
// To stop:
// SendString(IpAddress, dashboardPort, "stop\n");
Warning
Pay attention that the program you send include a newline after the last end keyword. Otherwise PolyScope can silently ignore your program.
The robot in the simulator should move for a while and then stop.
Every time you run the program the new robot program will overwrite the last robot program you have sent before.
Shutting down & running the container again#
When you finished your work, stop the container. If you want to start the simulation again, Run again.
Editor for writing URScript programs#
If you will write longer URScript programs, then I recommend the following workflow:
Writing the program on the VS Codium editor with URScript extension
Optional, especially in the beginning: Copying the program to the
Script codeeditor and checking for further errors.Copying the program to the C# code to run it on the robot.
VS Codium + URScript extension#
Install VSCodium
Install URScript extension on top.
Open settings with Ctrl,, activate
Format On Save.
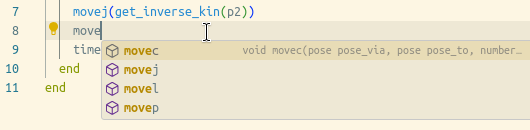
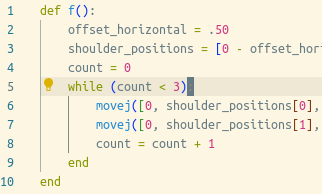
Fig. 7 Code completion using VS Codium with URScript extension.#
The URScript extension provides:
PolyScope script editor#
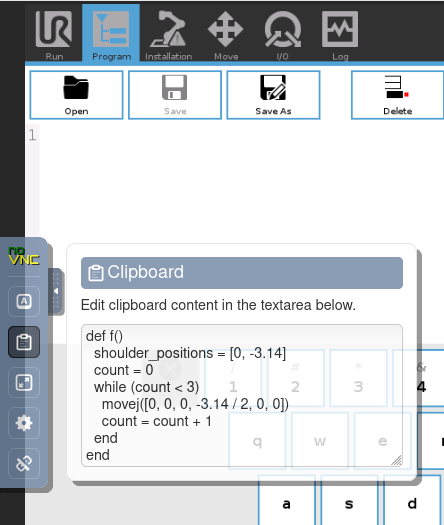
Fig. 10 VNC viewer clipboard#
Click
ProgramtabClick
Advanceddrop-down menu from the menu on the leftClick
ScriptSelect
Filefrom the drop-down menu on the rightIt will show
<No File Selected>if you did not edit any file before.Click
Edit.
Now we will copy our code to the editor
Copy-paste using Ctrlv won’t work directly. First we have to copy into the special field of the web software that acts as a remote desktop software (VNC viewer):
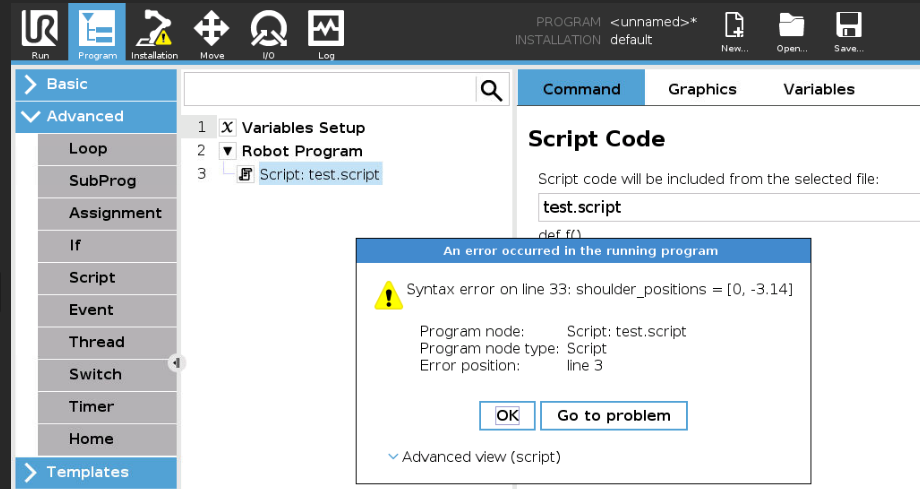
Fig. 11 Syntax error shown on the script code window#
Click the arrow button on the left border of the window which will show the
control bar, then on the clipboard icon as shown in Fig. 10.Close the
control barUse Ctrlv to paste your code
Click
Save Asand give a name.Click
Exit.You will be back on the
Script codewindowClick ️▶️ on the bottom of the window.
Click
Play from selectionorPlay from beginning. It does not make a difference as our program only consists of the script.If you have errors in your code, a pop up window will show them like in Fig. 11.
Used resources#
UR overview of client interfaces
includes a list of ports used in UR robots