Her finder du projekt-modrettede oplysninger.
Eksempler på projekter og deres deliverables
Error-proof Sorting project demonstration
Error-proof Sorting based on Sensor Input and Automated Pick-and-Place fra Ayşe, Jacob, Prathiga, og Shamla
Automatiseret Sortering i Reverse Logistics demonstration video 1
Automatiseret Sortering i Reverse Logistics fra Anton, Hector, Jonathan, og Magnus
Ovenikøbet forventes der en 🚀 projektproposal, som skal afleveres i 13 uge periode.
Almindelige support 🛟
Gökçe: hverdag kl. 10-11, 14-15
TA: hverdag kl. 10-12, 13-15 (uden 19. og 21. januar)
DBL: Især på robotprogrammering
I kan forvente support fra Árni og Morten hver dag under 3-ugers periode. Timerne fordeles mellem for- og eftermiddag, i tidsrummet (cirka) 9 til 15. De støtter jer i arbejdet med jeres projekter på robotterne og det fysiske system. Hvis I har problemer med teknikken (noget der ikke virker), så kontakt Árni og Morten omgående, da vi er tilgængelige på campus - enten ring, kom forbi kontoret F1.01, eller e-mail.
Kameraer og machine vision til projekt
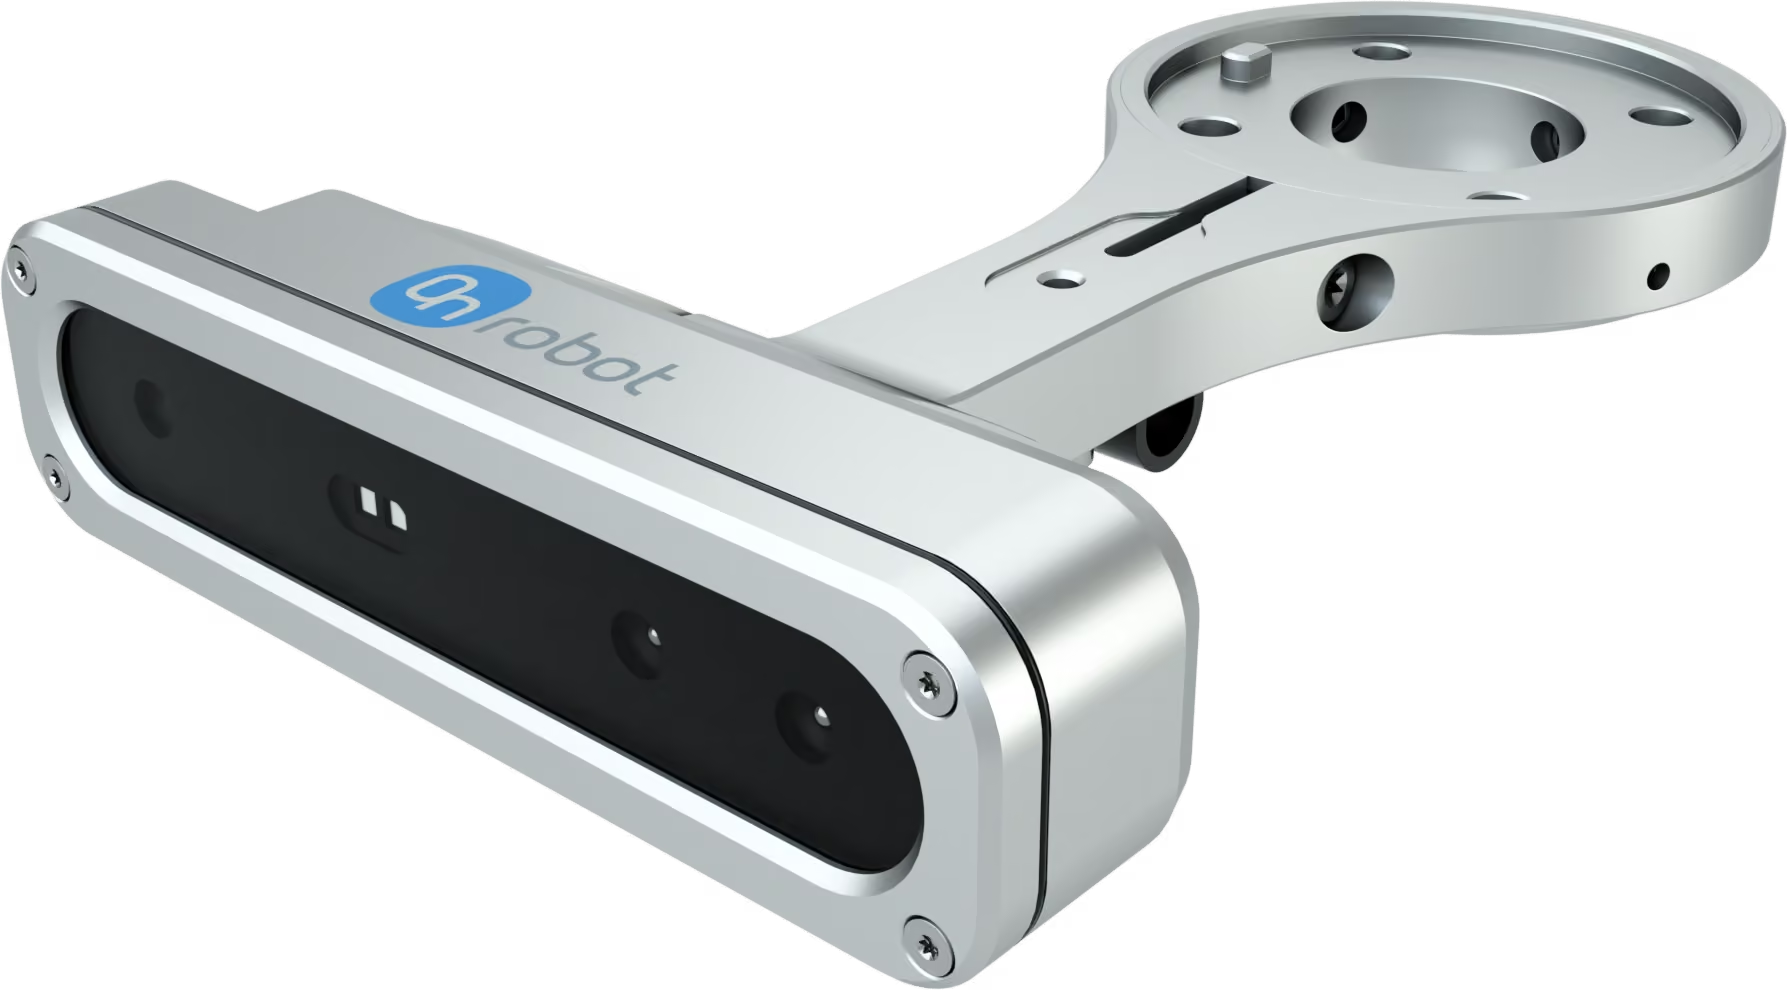
©OnRobot A/S Eyes Source
Vi har vision systemer monteret på halvdelen af vores robotarme (dem med ledninger på). Det er nemt at komme igang med. Systemerne er OnRobot Eyes. Hvis I vil bruge dem, så start med at læse README for dem og se videoerne linket heri, på RobotLabs learn -> https://
Vision modellen trænes gennem en browser. Info om dette er i README. Man opsætter først et camera view, hvor robottens pose vælges (så kameraet kigger på den flade hvor emnerne er, fx bordet). Husk at tænke på lyssætning! Den skal være ensartet fra gang til gang i bruger udstyret - derfor skal i mørklægge lokalet med rullegardinerne, så atmosfærisk lys ikke påvirker for meget.
Herefter trænes en “task” til detektering (der er 3 forskellige detekteringsmetoder - colour, outline og inline features. Den bedst egnede afhænger af emnets geometri). Husk at læse manualen for best practices!
Når man er færdig med træning kan task mv kaldes som funktioner i URScript. Funktionerne er gennemgået i manualen under sektion 5.3.
Requirements
fit Industry 4.0 pillars and Industry 5.0 goals
use the following components:
Robot arm (URScript)
Database
GUI (C#-based)
apply at least one security principle
Physical tools for your project:
Overview of what you can use aside from the robot arms:
Conveyor belt
Lego bricks
3D printer and printed parts from previous projects
Sensors:
Camera for object identification
Photoelectric sensor, e.g., this
Some robots have two photoelectric sensors (on-off, different sensing distances) and one limit switch connected. The limit switch signal is connected to both robots on the same table.
Automation requirements
The robot task should depend on external data. A negative and positive example:
a robot doing the same motion over and over again: ❌
you enter some data to your GUI and your robot moves according to the data you entered: ✅
Here are some technical details and recommendation how to achieve automation in interplay with C# and URScript:
The robot should be able to do multiple tasks based on external data, e.g., database, customer order, internet etc.
You create dynamic URScript code, e.g., like this code where the X position of an item is set by code. How to create dynamic URScript code:
Ideally, you should write your URScript code manually. Using the visual programming tool on the pendant for robot tool position programming may create code which is not modular and difficult to modify later on.
There are cases where it may be convenient and fast to prototype with a pendant-based program, e.g., when you use the camera. If you go this way, transfer the program via USB-code to your computer, simplify it by deleting parts that you don’t need, and lastly use it as a guide to create your own URScript.
As a last resort, especially if you have problems with manual programming, create multiple programs using the pendant and send one URScript code dependent on your data. However, you should be able to write and understand basic programming constructs at the end of this course, so I recommend using manual programming.
Proposal structure

Notafly, CC BY-SA 4.0, Wikimedia Commons
Choose a problem that you really would like to solve. Otherwise the project period can feel very long 😮💨. In the ideal case you may get a project that you can showcase in your job interview 🤩.
Include the following:
The problem you would like to solve.
Why this problem matters to you and who benefits from the solution?
How your solution fits into Industry 4 pillars and Industry 5 goals?
List goals and date for each project stage.
Go for the moon, but have a minimal viable product (MVP) that takes off without any humans in it.
Have an idea that you have fun building but focus first on an MVP that demonstrates the core of your idea.
Include at least two milestones. One of them must me the MVP.
Write a list of what you will use.
Example:
3d printer for printing component containers
https://
frankfurter .dev/ to get stock market data camera for object classification
conveyor belt to feed the items to the robot
Sets the expectations for the project execution. Important for mutual commitment and accountability.
Distribute tasks to group members, so that each member is at least responsible for one part of the project.
All in all, the project proposal is a compass 🧭. It will probably change during the project period, when you learn by doing.
Use of LLMs
In the previous weeks, you were allowed to use LLMs only as a feedback tool—now you may use it to generate code from the beginning. LLMs often produce complex solutions if prompts are not specific. So prompt the LLM that it generates code that you understand and stick to the programming structures introduced in lectures.
You must be able to explain and modify any LLM-generated code during your presentation. Also support from the teaching staff will be limited if you have complex code.
Deliverables
You will add the following to your project repository that you already used in first weeks, e.g., for certification and proposal.
piece | Expected path | notes |
|---|---|---|
Code |
| VS Code project, URScript |
| Additional videos and other file formats also allowed. | |
Engineering report |
| You can add additional formats, but PDF must be present. |
Presentation |
| You can add additional formats, but PDF must be present. |
Demonstration video
During the exam, we won’t have time to set up the robots. Moreover, there is a significant chance that your project may simply not work during the presentation due to stress.
Record a video of your project video that you will use during your presentation.
The interaction between your GUI and the robot’s task should be visible in the video.
Before you begin recording, place a sheet of paper on a visible surface with the recording date and your group’s name written on it. The paper is a proof that work belongs to your group.
Accelerate or remove parts of the video if needed. Acceleration and removing saves you time during your presentation and skips irrelevant sequences.
If your video is less than 100 MB, then you can upload it to your repository. Otherwise try to compress it. In worst case upload it on a video platform like Peertube, Dailymotion, and Youtube.
Engineering Report
Size: Not more than five pages per student. Focus on your own design and implementation work including reflection, rather than for example literature search.
Format: PDF
Language: Danish or English
The engineering report that documents your project at least using the following sections:
Problem
Solution
Existing solutions
Less than one page. I recommend a structured table with:
solution & link to the project if available
relevance for your project
pros
cons
Design & implementation
Diagrams, e.g., flowcharts
Explanations why certain design decisions were made
Test & Demonstration
Pictures
Video link
Discussion & conclusion
Did you solution meet your goals? Include your milestones from your project proposal on a table and show whether you met them or not.
What are the limitations of your product?
Another perspective: What would you change if you had more time or other resources?
Lessons learned about programming, industrial automation, human-robot collaboration.
For the problem, solution and milestones, begin with your text from your proposal and refine it with more technical details.
Other requirements:
Student names and matriculation numbers are listed on the title page.
Include your repository link on the title page.
Do not include large excerpts of code in your report. Prefer visual diagrams instead.
Include at least one diagram that visualizes how different parts of your project interplay.
See the writing as part of the learning process and write the text yourself. Use the LLM to get feedback on your writing.
Censoren og mig vil bruge dette skema for at vurdere jeres rapport. I vil få en samlede og individuel bedømmelse på rapporten og præsentation.
Presentation (Oral exam)
Eksamen foregår i grupper (max. 4 studerende hver gruppe). Mig og censoren vil være til stede. Varighed: (antal studerende * 10 minutter). med spørgsmål. Hver studerende skal præsentere sin del omkring ~4-5 minutter. Mig og censoren kan afbryde og stille spørgsmål.
The presentation will be the oral exam. It will be in groups.
The language can be Danish, English or Danglish.
I recommend starting with a short slide about the problem you are solving and then immediately playing your demonstration video.
In total, every students should be able to present about five minutes about their task in the project.
I will ask questions during and after your presentation.
Whole presentation examination will take about ten minutes times the number of students.
Prefer visuals and diagrams to text.
Upload your PDF slides to your repository under
docfolder, so I can easily find it before your presentation. We will use my computer for presentation and you will get a presenter.